Showing posts with label Paint. Show all posts

Wednesday, January 9, 2013

Deliveries & Setbacks

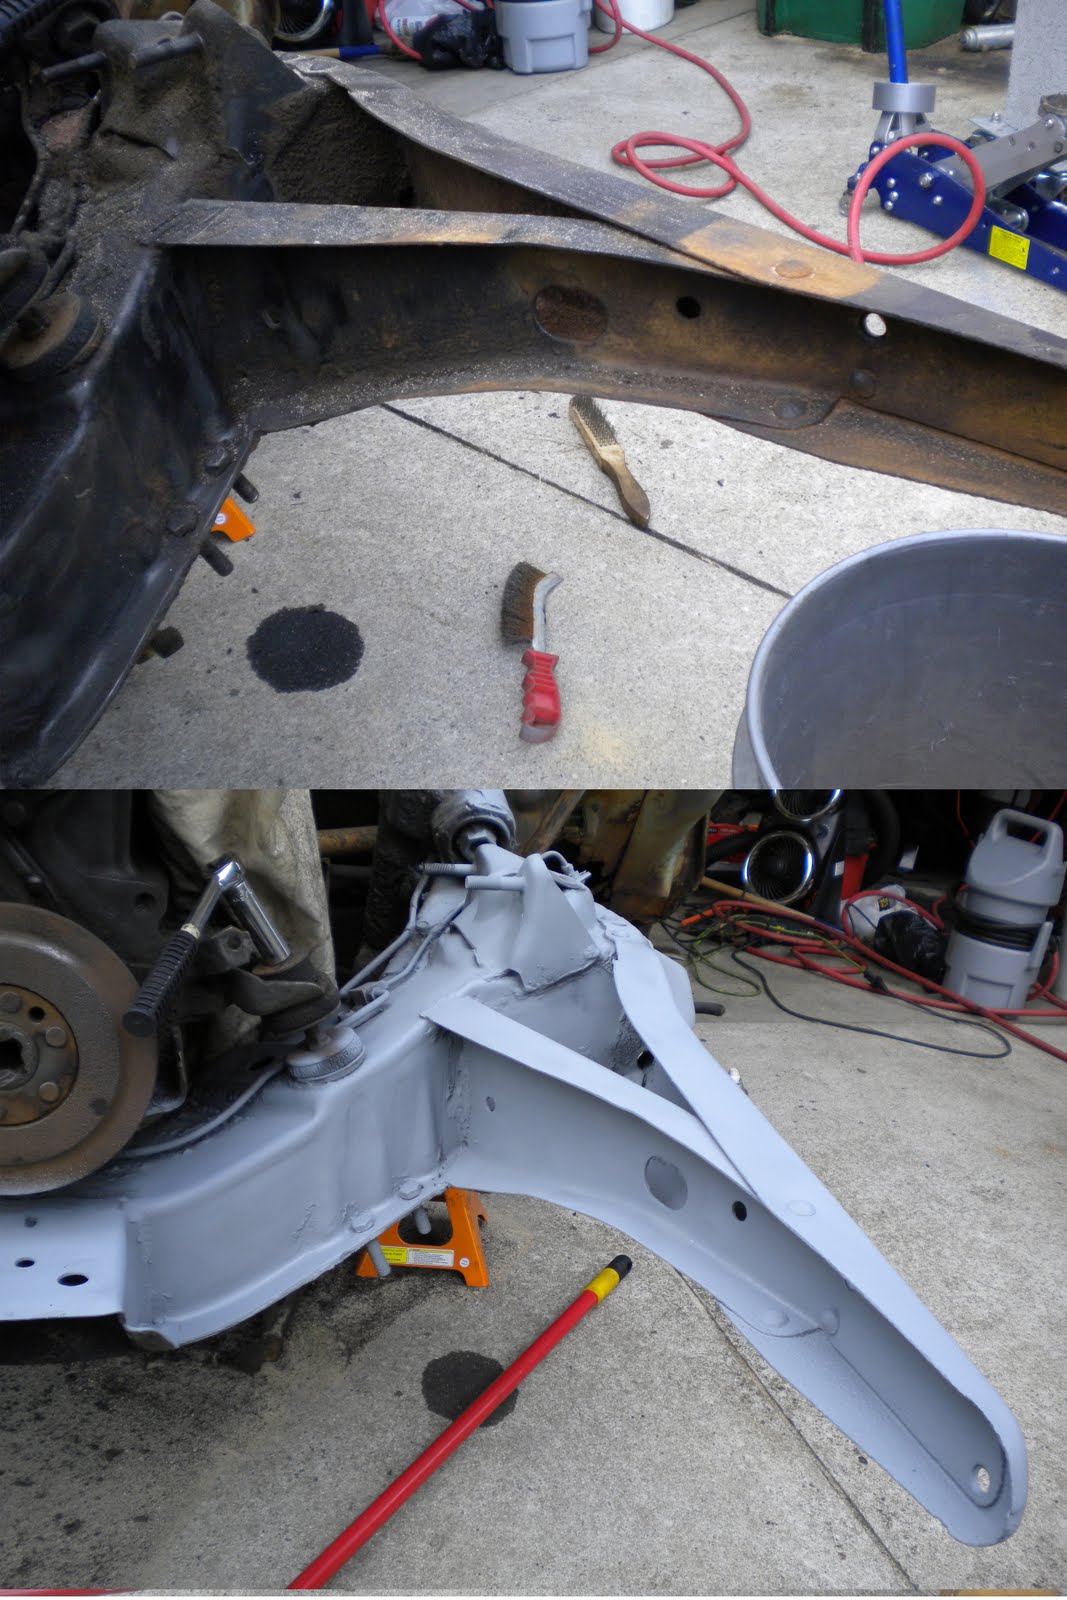
I sanded and scrub down the firewall Center and driver side portions anyway as well as the front frame.  I then used automotive grade rust reformer 2 coat any bits of rust that I might have missed, causing them to turn into a hardened paintable surface. 

My power disc brake conversion kit for the front off the 55 Chevy arrived this morning! As soon as my springs and shocks get here I might start putting the front end back together!

Now for the setback, I was trying to extend my workbench so I was moving a metal shelving unit and something fell off of it on to that water main sticking out of the wall... This broke the old cold plastic pipe causing tons of water to come stealing out all over me and the garage... As I jumped up to go shut off the breaker to the water pump I slipped or tripped on something smashing my face on the wall cracking a rib on my workbench and smashing my right pinky into the wall!

Long story short I shut off the water eventually got myself enough breath to drive to Lowes to get the parts needed to fix it, got home and repaired the pipes all with bruised ribs and a broken finger and a big knot on my face... PS I was able to bend my glasses back into wearable shape!

Thursday, August 16, 2012

Engine Rebuild Update

A few Quick video updates...
second update 
Just been working on getting the engine put back together and painting it in sections.  I read that judges take off points if the gaskets are painted, not that I plan on entering car show/contest as a serious contender but I do want to go for as much authenticity as possible.  Also if I paint it all together paint will cover my pretty Shiny new Stainless Steel bolt kit!
Hopefully tomorrow morning I can bolt the head to the block and get the pushrods & Rocker arms aligned, install the oil pump, pickup tube & oil pan.  Then I can bolt on the fuel pump, distributor, install spark plugs & wires, flywheel & Bell-housing.  Then all I'll need before mounting the engine back in the car is the tranny rebuild...

Wednesday, June 13, 2012

Engine Work

I Got the engine hoist all cleaned up (it sat in a rusty environment for years), after sanding and lubing up the hydraulic shaft, I put the entirety of my body weight on the crane to help break the rust free and got it pumping smoothly.   I went to Lowes to pick up a Heavy Duty chain for the hoist I decided to get the strongest one they had.  This chain can lift 3900# and I only paid ~$3/ft.  Then I had to find the Class 8 bolts to mount the chain to the engine block as the original bolts weren't long enough to get through the chain and securely fasten to the engine.  
 I Finally got the engine off of the frame after about 2 hours of crawling under the car, yelling, banging, more crawling, and a little bleeding (gashed my knee crawling out from under her).  There were many things hooked up that aren't easily visible, Shifting Linkage, grounding cable, transmission/driveshaft...
 Here she is hanging free and clear out in the driveway 
There's the big empty hole waiting for me to finish blasting the frame and firewall, within the next week or 2 I'm hoping to get this ready for prime and paint.
Here's Me and my brother getting the engine mounted on the stand.  (for the record that's my pink work shirt, I didn't want him to get his shirt all greasy) 
Here she is without the valve cover, oil pan, transmission & bellhousing.  My Engine expert/buddy Beau Tiffany was helping me take her apart and told me that a lot of the parts look fine/reusable and apparently this engine is all original with the factory copper head gasket still in place.  
 And here are my finished rims next to the finished Valve color, I think the colors look good together!

Saturday, April 21, 2012

Carb Rebuild Done!

I finally finished my carb rebuild! cleaned up and painted with "Eastwood Carb Renew II" chemical and gas proof paint specifically made for carbs. I think it looks spiffy.Here's the Air filter and carb together as before and after shots... I'd say it's quite an improvement...
And after I got my new Air compressor working, I tested out my new Dual Action sander on the driver's front quarter panel.
I decided the inside needed to soak a little more before the final sand and priming before I learn to weld in the patch panels! I have thought about just using fiberglass to patch up around the eyebrows and the rear of the panel, but several people have told me that welding in patch panels is the best way to go... so I guess I'll try to do it the right way even though it's going to cost A LOT more to buy&weld in new sheetmetal.

Wednesday, April 4, 2012

Trim paint

Here is the color of the trim I decided to go with, it's dupli-color royal blue metallic. Looks pretty good in the pictures but it looks even better in person.


FENDing off rust

Before & After of my Left inner fender. I finally found a really close paint color I like So I laid on a coat! Another coat or 2 will darken it up a bit.

I also got my tires off of the rims, scraped off 30 years of dirt & paint and now they're Soaking in the phosphoric Acid Solution. The "Acid Vat" has been sitting in the sun untouched since September and seems to have concentrated a good deal! I accidentally dropped in a part and fished it out with my arm... Lets just say it burned a bit before I washed it off, It was only about 10% when I made it last year and I could wave my arms in it Willy-nilly with no burning feeling.
More pics and Stuff later on this week...

RKS

Sunday, August 28, 2011

OOOOH Shiny!


I love the Glossy "wet look" that this ended up with! I put like 3 or 4 coats of the gloss black on it and i think it looks nice.


Friday, August 26, 2011

I was Framed!


Here's what I got done today... I dragged the 55 half out of the garage to sandblast the frame around the engine, I got the driver's side as done as I can until I yank the engine & trans these pics of the primer look pretty good, I have since put on a few coats of glossy black that look really nice. (a shame since most of the frame won't be visible...)
I only had about an hour and a half to do the work since by the time I got her dragged out and the time I knew it would take to clean up the sandblasting mess(to please my beloved wife). I think the other side will turn out nice too either tomorrow or Monday...


Should anyone like to come over and lend a hand with anything (sanding,painting,tear down of interior) please send me a shout on Facebook or call me (my #'s on FB as well)! If you'd just like to stop by to chat or watch me get frustrated ;o) do the same. Just give me a days warning to have the place spiffied up for company!

PS here's what I plan on her looking like when finished...


My interior paint will be a few shades lighter than the ones pictured but they are pretty.

Tuesday, August 23, 2011

Stalled due to Inflation!


Sorry I've been dormant so long, between biking to work and other random things...(video games) I haven't had/made a lot of time to work on the '55. The other problem is a lack of fundage... Saving up money to buy a new air compressor while trying to catch up on bills from my "disability pay" period put a huge damper on my spending for the car. I did manage t get a few more parts primed and painted though.
The problem I came across yesterday is how am I to sandblast the front frame without turning my garage into a beach again? Anyway I've had several guys offer to help me yank the engine and rebuild it properly which I have gladly accepted and plan to get together as soon as all parties are free to do so.

Upper control arms after 1st coat

Radiator Support frame


The exhaust/intake manifold next to the Valve cover, I decided the engine is going to be "Chrysler blue" since thats the closest shade I can find to the original in High heat paint, and the Exhaust & all engine accessories will be glossy black (i.e. generator, oil filter holder, fan, pulleys, battery box etc...) I think they look good together.


Here's a pic of the stock engine!

Saturday, July 30, 2011

Painting!

^Front Spring Before, After Soaking, Painted

^Inner Fender after soaking, Painting


Valve Cover Before, after soaking, scrubbed, Painted


Freshly painted Valve cover on the engine waiting to be pulled so I can rebuild and paint it!

So I got the replacement tips for the sandblaster, got them installed and..... nothing! I dumped out the sand from the hopper to see if it was the problem, but no... the siphon tube that was supposed to be sucking the sand up through the blaster nozzle was blowing air into the hopper! Thanks Harbor Freight for a $20 piece of junk!
Now in their defense a lot of their stuff is awesome and I spend WAY too much money there, and if I take it back they'll probably give me a new one. I just don't feel like driving to W-S to do it because the GSO store doesn't carry this one...
Anyway that ticked me off and set back my plans for world domination.... OOPS I mean the restoration...

Check out all of my 55 pics on Facebook...
http://www.facebook.com/media/set/?set=a.892900972381.2354362.25003132&type=1\

Monday, July 18, 2011

Before & Afters Rust Treatment

Fan Before & After
Jack Base & Hood Latch Bracket After & Before
Jack Pole
Grille Before & After
Fan, Radiator Support wall, Battery bracket, & Water Pump Pulley Before & After.

Here's some before and after pics I took after leaving these parts in the Molasses from Thursday night to Monday morning. I pulled the parts out of the solution and hosed them off and gave them a quick scouring with a wire brush and there was bare metal and original paint! I noticed that after a few minutes the parts began to "flash rust" I wasn't too surprised since I'd read about that happening. So I brushed off the parts again, rinsed dried and sprayed them down with "Rustoleum Automotive Rust Preventing Primer" so that they wouldn't re-rust. More to come!